Showing posts with label Chocolate. Show all posts
4.17.2014

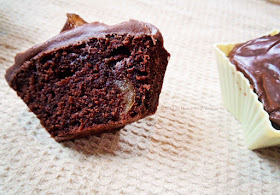
Chocolate Orange Cupcakes With Orange Blossom Glacé Icing

As-Salaamu Alaykum,

Apologises for my lack of posting in recent months.

Here are some yummy cupcakes to re-break the blogging ice.

My first lot of Chocolate Orange Cupcakes I made way back in 2012 are still great but this time I chose to put a layer of orange blossom water glacé icing on top of each cupcake instead of a mountain of buttercream.  

The orange blossom water cuts through some of the sweetness of the cupcake, yet your sugar craving is well and truly satisfied. 

The baking cups I used were deep so the mix made 10 instead of the usual 12 and even then, they didn't rise to the top. This of course can be avoided if you use regular cases (liners). Do let me know if you try the recipe how it worked for you.

Chocolate Oranges Cupcakes With Orange Blossom Glacé Icing 

Makes 10-12 portions

Ingredients

Cupcakes

150 grams slightly salted butter (softened)
150 grams caster sugar (i prefer to use golden)
175 grams self-raising flour
25 grams cocoa powder 
3 medium size eggs
zest of 1 large orange (i used navel)
orange blossom water / orange juice

Glacé Icing

200 grams icing sugar 
1 teaspoon orange blossom water
1 -2 tablespoon water

Decorate

sprinkles of your choice

Method

  1. Pre-heat oven to 180C/gas mark 4. Lay out baking cups on a baking tray.
  2. Using an electric mixer or with a wooden spoon and bowl mix together butter and sugar till light and fluffy (5-10 minutes)
  3. Beat in the orange zest.Add eggs one at a time, ensuring each one is thoroughly incorporated before adding the next (5 minutes)
  4. Sift flour and cocoa powder into bowl and with a large metal spoon fold into the mixture until just incorporated. 
  5. Lightly mix in enough orange blossom water/orange juice until you get a dropping consistency.
  6. Using a 1/4cup or ice cream scoop, divide into baking cups. Bake in centre of oven for 15-20 minutes until firm to touch.
  7. Remove from oven and leave to cool.
  8. Once cupcakes are cool make the glacé icing; in a large bowl sift in icing sugar, add orange blossom water and 1 tablespoon water, gently mix adding more water as needed until it's just thick enough to coat the back of a spoon.
  9. Top each cupcake with a generous teaspoon of glacé icing and decorate with your favourite sprinkles.
10.23.2013

Tahini & Chocolate Chip Cookies [vegan]

As-Salamu Alaikum,


These cookies are the best 'vegan' recipe I’ve ever tried, you do not miss the butter or eggs at all.


Made using Tahini; a paste made from ground hulled sesame seeds and popularly used in middle eastern dishes such as hummus, tahini has 10 main health benefits:


1.       It’s rich in minerals such as phosphorus, lecithin, magnesium, potassium and iron. 

2.       It's a good source of Methionine, which aids in liver detoxification

3.       It’s one of the best sources of calcium out there. 

4.       It’s high in vitamin E and vitamins B1, B2, B3, B5 and B15. 

5.       Helps to promote healthy cell growth. 

6.       Prevent anemia. 

7.       Helps to maintain healthy skin and muscle tone. 

8.       It has 20% complete protein, making it a higher protein source than most nuts. 

9.       It's easy for your body to digest because of its high alkaline mineral content, which is great for assisting in weight loss. 

10.   It is high in unsaturated fat (good fat!)

Tahini is an acquired taste but throw in sugar and you can pretty much get everyone loving it, hence why Turkish halwa/halva is so popular but wow throw in chocolate chips and you have something your taste buds won’t be able to resist hence, I advise you make a double batch and share them with your friends/family immediately.


To give these cookies a true taste of north Africa I added a tablespoon of orange blossom water which worked well with the bitter dark chocolate and offset the sweet caramel taste from the unrefined brown sugar but if you want to sure you can leave it out, you can use some vanilla as per the original recipe or even rose water would still work but just remember with flavoured waters a little goes a long way by no means do you have to use a tablespoon it’s all down to personal preference and as most flavourings out there they are of different strengths so experiment.


You will adore these soft, dense and satisfyingly chewy cookies, they can even be slightly crisp on the edges if you bake them long enough.


I don’t know about you but I prefer cookies just a tad under baked (cookie= scant 1/4 cup bake 8-9 minutes) and with no egg in the recipe no worries of giving anyone food poisoning, big +


As I bake to inshaAllah please all, husband gets his with golden edges (cookie = scant 1/4 cup bake 10 minutes)


 I even made slightly smaller ones for the kids ( cookie = 2 tbsp bake 7-8minutes) not that they are happier having smaller ones...


I used 53% dark chocolate chips  in my cookies which I purchased from Chocolate Trading Company, it’s a great site for everyone with lots of details and ingredients list you are bound to find a chocolate or 2 to suit you. Of course, being Muslim I advise you choose those containing no alcohol.


What is your favourite type of cookie/biscuit?

Tahini & Chocolate Chip Cookies

adapted slightly from here
Makes around 12-18 (depending on size, see below)

1cup =250ml (British Standard)

 Ingredients


  • ¼  c caster sugar


  • ¾ c unrefined light brown sugar (I used muscovado), packed.


  • ⅔ c tahini (stir well before measuring)


  • ¼ c vegan margarine 


  • ¼ c made up of 1 tbsp orange blossom water and water.


  • 1½ c plain flour


  • ½ tsp baking soda


  • ½ tsp salt


  • ¾ c chocolate chips

  • Method


    1. Preheat oven to 375F/190C/170C Fan
    2. Line a cookie sheet with foil.
    3. In a large mixing bowl, cream together sugars, tahini, margarine.
    4. Beat in water and any flavourings you wish to add.
    5. In a small mixing bowl, sift together flour, baking soda, and salt.
    6. Add dry mixture to wet; beat to combine. Dough will be stiff but not dry.
    7. Fold in chocolate chips.
    8. Using an ice cream scoop (about a scant ¼ cup), place 6 balls of dough on a cookie sheet or using 2 tablespoons  of dough per cookie, place 8-10 balls of dough on a cookie sheet.
    9. Flatten balls to desired cookie thickness, mine were about 1/4-1/2cm thick.
    10. Bake between 7-10 minutes (see post for more details)
    11. Let cool on cookie sheet for a few minutes before transferring to a cooling rack to cool completely.
    12. Store in sealed container or cookie jar. Best eaten within 3days.
    *Disclosure: I wasn’t asked or paid to advertise any company in this post, all opinions are my own.

    Please note, after a friend tried this recipe using butter (instead of margarine) she found the cookies to be too dry. this might be due to a number of things i.e. the tahini being too thick, measuring inaccurately etc, therefore if you want to make this recipe non vegan please by all means go ahead use butter but if you find the mixture too dry you can add/beat in 1 egg or add more water to get the consistency right.
    5.29.2013

    Dairy & Egg Free Baking: Date & White Chocolate Cookies / Biscuits

    As-Salamu Alaikum Sisters / Greetings Dear Readers,

    I originally eyed a version of these cookies/biscuits on The English Kitchen and was immediately drawn to them not only because they looked scrummy but the way Marie described them was oh so tempting!

    I admit I have a lot to learn on how to write a come and bake me now foodie blog post but one thing I can do is photos, mobile phone photos at that which I'm not ashamed to say have then been edited in Photoshop!
     
    Yes, I have to work with what I've got, not only in my digital life but also in my kitchen cupboards and I wanted to make these especially for my dairy and egg allergic daughter and masha'Allah I just so happened to use my last Orgran No Egg, Egg on these yummy cookies!

    No second guessing, I took a bite out of one, two OK I forgot how many I had......they were good and the perfect bite size treat.

    I'm 95% happy with these cookies, the only thing I may do differently next time is increase the amount of vegan margarine a smidgen.

    The original recipe contained 50g butter plus the fat from 1 egg and 50g white chocolate chunks which meant Marie's cookies spread due to being higher in fat than mine but hey the sugar content more than made up for any loss in fat in my version and you know what excess sugar converts to don't you? F.A.T. so I won't be saying these are the healthiest cookies in the world but again I'm working with what I have got ...... sugar! you can only imagine what this hormonal pregnant woman did when my 4year old knocked the tub containing my rare buy of rather expensive unrefined golden caster sugar on the dining room floor, yes I cried that's how much sugar means to me......sad but true.

    OK so if you have the need like i did to make these cookies allergy free or you just fancy a change in  your all butter and egg kitchen then follow my recipe, if not check out the original I'm sure you will enjoy either.

    Date & White Chocolate Cookies / Biscuits (Dairy and Egg Free)

    Makes: 19 x 1 tbsp sized cookies
    Adapted from the English Kitchen

    Ingredients

    50g Pure Dairy Free Sunflower Spread or any other suitable vegan spread
    80g unrefined golden caster sugar
    few drops of pure halal vanilla extract or use vanilla golden caster sugar in place of regular golden caster sugar
    1/4 tsp Orange Blossom Water optional (provides I subtle background flavour)
    Equivalent of 1 Egg of your chosen egg replacer (I used 1 heaped tsp orgran No Egg made up with 2tbsp water )
    70g whole, pitted dates, cut into chunks
    50g Dairy Free chocolate buttons (These are halal certified)
    130g plain flour
    1 1/2 tsp baking powder

    Method

    Preheat the oven to 160*C/140C (Fan) /325*F/ Gas mark3. Line two baking sheets with baking paper and set aside.

    Beat together the vegan spread and sugar with a wooden spoon until light and creamy. Add the vanilla, orange blossom if using and egg replacer, mixing it in well. Sift together the flour and baking powder and stir into the creamed mixture. Stir in the chocolate and the dates.

    Drop tablespoon sized drops onto the prepared baking sheets. I did 9-10 per baking sheet

    Bake for about 25 minutes, or until they are pale golden brown, and a bit crispy on the edges. (I move the trays around halfway through the baking time so that they bake evenly.) Remove from the oven and allow to cool on the baking sheets for a few minutes before removing to a wire rack to finish cooling completely.
     
    **Please note I have not been compensated or asked to advertise any of the allergy free products displayed in this post, they are personally what I chose to use and although I can't guarantee 100% that the Pure Dairy Free Sunflower Spread or Orgran is halal, I wrote to the manufacturer of Pure Dairy Free who responded that they don't make any claims that their products are suitable for a halal diet they did say they don't use alcohol to make their spreads and that their spreads are suitable for vegans.
    I haven't had chance to write to Orgran about their egg replacer but if you look here you can read the ingredients list and this product is also suitable for Vegans.
    4.11.2013

    Chocolate Covered Lemon Cake

    As-Salamu Alaikum / Welcome Reader,

    No denying I enjoy eating my fair share of cake but what I like just as much is making/baking it.

    I find making and baking a cake very therapeutic and satisfying for the soul, every baker whether home or professional I'm sure feels the same.

    This cake came from having an urge to bake cake (it happens often) but only having 150grams unsalted butter left in the house, lemons and a bar of plain chocolate cake covering and so my chocolate covered lemon cake was born and shortly after devoured.

    You can't beat a buttery, soft, zesty cake with a chocolate 'shell' for extra self-indulgence!

    I'm no stranger to the combination of chocolate and lemon together, I recently made chocolate lemon cupcakes and was bowled over by how well they work together BUT feel free to swap the lemon for an orange and you can have a chocolate covered orange cake or if you like cupcakes try my most popular viewed chocolate orange cupcakes instead.

    Onto the recipe

    Chocolate Covered Lemon Cake

    Makes a 1x 20cm cake

    Ingredients

    150 grams unsalted butter or margarine, room temperature (take it out of the fridge the night before)
    150 grams caster sugar
    Zest of 1 lemon
    3 eggs, medium or large
    1 Tablespoon Lemon Juice
    150 grams self-raising flour

    To decorate

    150grams plain chocolate, melted
    Sprinkles (optional)

    Method

    Pre-heat oven to 350F/180C/160C (Fan)/Gas Mark 4 and place your oven rack in the centre.

    Line the bottom of a  loose based 20cm round cake pan, grease and flour the sides.

    Place butter, sugar and lemon zest in a large bowl, cream together until light and fluffy.

    Add eggs one at a time, making sure each egg is fully incorporated before adding the next. If you notice the mixture curdling you can add a tablespoon of your self-raising flour to stabilize the mix.

    Add lemon juice then sieve in self-raising flour, fold in until your mixture is homogeneous.
    Pour cake mixture into cake pan and level using a palette knife. Bake for 35-40minutes or until a cake tester comes out with clean or with a few dry crumbs clinging to it.

    Remove cake from oven and place on cooling rack. Cool for 10 minutes in the pan, run a knife around the edges then loosen the collar on your loose based pan and remove it, leave on base place on cooling rack to cool completely then remove base and baking paper.

    Place cake on serving plate, you may wish to level it but I didn't. Melt your chocolate in a heat proof bowl inside microwave on 30seconds bursts until full melted. Pour chocolate over cake and leave it to cool slightly before decorating with sprinkles. Leave chocolate to cool and set before taking a slice, if you can resist!

    Note
    If I were to make this cake again, I would add some lemon zest to the top of the cake after pouring on the melted chocolate, just to give it that bit of extra zing! I did add lemon sugar crystals on half the cake (husband doesn't like sprinkles so I try to please everyone lol) but they didn't give so much lemon flavour as I hoped.
    4.02.2013

    My First Chiffon Cake - Peppermint Chocolate


    As-Salam Alaykum,

    As with all firsts it didn't go according to plan and I've learnt another valuable baking lesson, more on that in a tick, first what is a chiffon cake?

    Chiffon Cakes are also known as Mayonnaise Cakes as they contain oil, water and eggs unlike Angel Cake which are made using no fat and can be rather dry Chiffon retains  it's moisture which in my book means they are better.

    They are made by first whisking oil, egg yolks and water together, sifting cake flour and sugar into the oil mix and beating for 1 minute at high speed.

    To give the cake it's light airy texture the egg whites are whisked separately to stiff peaks with more sugar i.e. a meringue then slowly folded into the first, denser oil/flour mixture.

    Valuable Lesson - Fold meringue into the oil/flour mixture in 4-6 stages not in 2!

    I didn't fold my meringue into the oil/flour mixture well enough, thinking I would knock all the air out of the cake if I folded in the flour in many stages I tried to do it quicker in 2 but it didn't work when I poured the batter into my silicone cake pans there was still quite a lot of the denser oil/flour mixture at the bottom of the mixing bowl which I scraped out and put into the center of one of the pans and gave it a quick stir in hoping for the best!

    As I made two cakes the one you see below ended up being more dense in 'spots' where the batter hadn't been mixed / folded in properly Alhamdulillah it was still edible just not worthy of being frosted so I sprinkled it with icing sugar and put it to one side for second best bites.


    Chiffon Cakes usually are baked in tube/Bundt pans as this helps the cake rise evenly and as they tend to sink once removed from the oven they are baked in ungreased/floured sided  pans and inverted (onto such things as the bottom of a flower pot) upon removal from the oven and left to cool totally inside the pan.

    I haven't got any tube pans (they are on my long shopping list) so I resorted to my round silicone pans and still inverted them, onto a cooling rack lined with baking paper however, as silicone is non stick they started to slide out and stick to the baking paper, ooops! So I do recommend you use metal cake pans for chiffon cakes. It wasn't such a disaster after all, as once the cakes had cooled completely and been unmoulded from the silicone pans I peeled off the baking paper without causing too much damage to the surface of the cakes and kept those sides face down :)

    The need to make the buttercream icing green and blue for this cake apart from it being peppermint flavoured of course, was that my 4year old son asked me for a green monster cake.
    He got a green and blue frosted chocolate cake without a monster in site (depending on how you view this cake that is lol) I intended the blue to be a rose in the center, but I used an unfamiliar open star tip (not the wilton 1M which is my favourite for piping roses) and ended up going for a swirly circle?!

    Next time I make this cake, I will dare to slice the fluffy pillow in 2 and fill it with a lighter buttercream, say Italian meringue or even whipped cream would go well as the cake is so delicate it deserves a filling to match.

    Here is my cake recipe, using self raising flour instead of the more traditional cake flour.
    The cakes flavour and the texture (lots of air holes) reminded me of a mint aero chocolate bar!

    Peppermint Chocolate Chiffon Cake(s)


    Adapted from Chiffon Cake Recipe found in the book, The Professional Pastry Chef by Bo Friberg.

    Recipe makes 2 x 23cm cakes but the recipe can easily be divided by 2 to make only 1 cake. I highly recommend you make just 1 cake if like me, it is your first time baking this type of  sponge cake. Folding in a 4 egg white meringue will be much easier than one made using 8.

    Ingredients

    2/3 Cup (160ml) Vegetable Oil (I used sunflower)
    8 Egg Yolks
    1 Cup (250ml) Water, room temperature
    1 Tablespoon Peppermint Oil
    336 Grams Self Raising Flour
    85 Grams Cocoa Powder
    400 Grams Caster Sugar, divided (see method)
    8 Egg Whites

    Method

    Pre-Heat Oven to 375F/190C /170C (fan)

    Beat Egg Yolks, Oil, Peppermint Oil together and stir in water.

    Sift Flour, Cocoa & 130 Grams sugar into egg yolk mixture and mix in. Beat mixture at high speed for 1 minute (2 if doing by hand with a spoon - it's hard work!) and set aside.

    In a separate grease free bowl whip your egg whites at high speed (I recommend using a stand mixer with the whisk attachment or an electric hand whisk) until frothy then gradually add 270 Grams sugar and continue to whisk until stiff peak stage.

    Fold Meringue into your cake batter in 4-6 stages, I used a tablespoon to do this but ideally you need a bigger metal spoon or a rubber spatula.

    Divide final cake mixture equally between your 2 cake pans and bake in the center of your oven for 25-30minutes or until the center springs back slightly when pressed with a finger.

    Remove from oven and invert pans onto a cooling rack and allow to cool.

    Fill and decorate your cake with your favourite icing, whipped double cream, jam, layer of fruit etc..
     
    3.22.2013

    Chocolate & Date With A Hint Of Orange Blossom, Star Shape Brownie 'Cupcakes'

    As-Salamu Alaykum,


    These 'cupcakes' aren't really cupcakes at all but rather mini star shaped brownies! Baked in my new silicone star shaped cupcake cases (I'm such a big kid when it comes to bake ware) the 'cupcakes' tag had to be added to the end of the longest blog title ever or it just wouldn't be right in my cupcake lover eyes.

     
    Created when I had a desire to bake brownies after so many years of one not passing my lips, since high school which was like 10 years ago! to hand I had a bar of very dark (90% cacao) chocolate that even the kids won't eat so perfect for me to take and use in brownies but just one thing my husband is not a big chocolate lover so I had to think how I can make these brownies more to his taste and we all know Algerians like dates and orange blossom right?

    Love the Name!
    Au natural dates are rare to find in the UK, most are coated in glycerin, glucose syrup or both which is a shame because dates last a very long time without any preservatives at all.

    Orange blossom water is a light background note in these brownies that is easily missed if you can't distinguish it's floral slightly bitter taste from all the dark chocolate in it's way i won't blame you and it can easily be left out all together or replaced with some orange zest and freshly squeezed orange juice because let's face it chocolate, dates and orange just work and I was right (for once) masha'Allah hubby liked how the brownies weren't overly sweet (they definitely needed the light coating of icing) and he liked the sticky date slightly fudgy texture of them too.


    No worries if you haven't got the star shaped cases, you can still bake these brownies either in regular cupcake cases or as a sheet of brownies but remember cooking times will vary than those stated in recipe.


    In the past I haven't been so overly impressed with silicone bake ware, I have 2 round cake pans made of silicone which I still have to line the bottoms of or my cakes stick but as you can see I had no problems removing the brownies from these cupcake cases I wonder why?

    I thought about it and maybe it's because I placed the cases on a lined cookie sheet before baking which I don't do for my big cake pans and I felt was necessary on this occasion as I didn't want any of my stars falling between the bars of the oven rack. I may just have to bake a cake to test my theory and of course I will give a full report and recipe in sha Allah.

    If your set on buying the Sweetly Does It Silicone Star Cupcake Cases like I was and your in the UK you can get them here I've also seen them on Amazon and noticed they do heart shaped ones too, how cute!

    A little side note.tip: for those who photograph food with a digital compact in their Kitchen while the washing machine is on, DON'T DO IT the noise seriously affects the quality of the photos.

    Chocolate & Date With A Hint Of Orange Blossom Star Shape Brownie 'Cupcakes'

    Recipe adapted from Joy Of Baking and inspired by Cook Republic's Chocolate & Date Fudge Brownies

    Ingredients

    For brownie 'cupcakes'

    • 85 grams / 3ounce Dark (90% cacao) Chocolate, broken into small pieces
    • 113 grams / 1/2 cup Unsalted Butter, cut into pieces
    • 100 grams / 1/2 cup Brown sugar (I used Demerara sugar as that's all I had to hand but any will do even white)
    • 3 large eggs
    • 1 tablespoon Orange Blossom Water
    • 95 grams / 3/4 cup Plain Flour
    • 1/4 teaspoon salt
    • 100grams / 1/2 cup plus 2 Dates, pitted and roughly chopped

    For Chocolate & Orange Blossom Icing - adapted from Easy Milk Chocolate Frosting for Brownies

    • 1 1/2 tablespoons Unsalted Butter
    • 94grams / 3/4 cup Icing Sugar
    • 1 tablespoon Water or Milk
    • 1 tablespoon Cocoa Powder
    • 1/2 teaspoon Orange Blossom Water
    You will need approximately 2 dates,  pitted and chopped for decoration.

    Method

     
    Pre-Heat Oven to 180C / 160C (Fan) / 350F / Gas Mark 4 and place rack in centre of oven.
     
    Place Star Cupcake Cases on a lined baking sheet, set aside.
     
    Sieve the Flour and Salt together into a medium size bowl and set aside.
     
    Chop dates, place in a bowl and coat in a pinch of your flour from above or place the  chopped dates in the flour bowl and gently toss!
     
    Melt chocolate and butter in a stainless steel bowl over a pan of simmering water. Once the chocolate is melted and smooth, remove from the heat and stir in sugar then let cool for a few minutes.
     
    Add the eggs, one at a time mixing well between each addition then add the orange blossom water and mix again. Add the flour/salt mixture and chopped date and stir until well blended.
     
    Evenly divide the brownie batter between your 12 cases, about 1 1/2 tablespoons of batter per case. Place in the oven and bake for 15-20minutes or until a tooth pick inserted into the centre has moist crumbs.
     
    Remove from the oven and place on a wire rack to cool.
     
    Once the brownie cupcakes have cooled make the icing: melt butter in a saucepan oven medium heat, add cocoa powder then remove from heat and stir in icing sugar, water/milk and orange blossom water until smooth.
     
    Spread icing over brownie cupcakes and decorate with a piece of date.
     
    *Tip: If you want to display the brownies out of their cases then remove brownies from cases before spreading on the icing or when you come to remove them from the cases the icing will slightly crack at the edges as pictured below.


    2.20.2013

    A Bakers Dozen (13): Chocolate Lemon Cupcakes


    Asalam Alaykum,

    Ever heard the term 'Baker's dozen'? Well a Baker's dozen in England = 13 why? you may ask, i know i have, when all bun tins i've ever seen are even numbered i.e. 6, 12....

    Here's the answer courtesy of Wikipedia

    A baker's dozen, devil's dozen, long dozen, or long measure is 13, one more than a standard dozen. The oldest known source for the expression "baker's dozen" dates to the 13th century in one of the earliest English statutes, instituted during the reign of Henry III (1216–72), called the Assize of Bread and Ale. Bakers who were found to have shortchanged customers (some variations say that they would sell hollow bread) could be subject to severe punishment including judicial amputation of a hand. To guard against losing a hand to an axe, a baker would give 13 for the price of 12 in order to be certain of not being known as a cheat. Specifically, the practice of baking 13 items for an intended dozen was insurance against "short measure", on the basis that one of the 13 could be lost, eaten, burnt, or ruined in some way, leaving the baker with the original legal dozen. The practice can be seen in the guild codes of the Worshipful Company of Bakers in London. 

    Masha'Allah the above reminded me of the following verses in the Qur'an regarding the matter of giving/receiving an accurate measure and weight in transactions.

    *note the following is the english translation of the meaning of the arabic verses.
    11:84. And to the Madyan people (We sent) their brother Shu`ayb. He said: "O my people! Worship Allah, you have no other god but Him, and give not short measure or weight. I see you in prosperity and verily, I fear for you the torment of a Day encompassing.''
    11:85. And O my people! Give full measure and weight in justice and reduce not the things that are due to the people, and do not commit mischief in the land, causing corruption.
    How many of you have been short changed in some form before? whether it's the description of the product or the number of items/money etc. By accident or on purpose, the feeling of being cheated out of something is not pleasant at all.

    Then on the other hand you have the example of  how bakers would give away 1 extra for every 12(dozen) to prove they weren't unjust infact they were being generous! Does the bakers dozen still exist in bakeries today?


    Well in my home Bakery lol it does, so on to my 13 Chocolate Lemon Cupcakes, i made a few changes including switching around the name from Lemon Chocolate Cupcakes

    I changed the name to reflect the flavour, instead of having too much of a sour lemon taste they had before, now they have a nice balance between rich deep chocolate and zesty citrus.

    I increased the amount of cocoa in the cupcake whilst removing it totally from the Icing which gave a nice contrast in colour and flavour.

    I swapped the Icing from a chocolate buttercream to a lemon cream cheese icing, i made a slight boo boo with the icing, it became too runny to pipe hence the pool instead of a thick swirl. This led to using less icing than original anticipated :) which meant i had some leftover for eating straight out of the bowl!

    Later, i discovered from the daring kitchen i wasn't the only one to have ever experienced this problem with runny cream cheese icing, what a relief! So from my limited research i discovered what could have gone wrong:-

    The order of making my icing, i creamed the cream cheese and butter together first and then added the icing sugar.

    I should have mixed the butter and icing sugar together and then added the cream cheese, i must try this next time in sha Allah but all in all i'm happy because the cupcakes looked ok and tasted great, so go on the next time your up for trying something new, give this odd but yummy flavour combination cupcakes a try!

    By the way, i didn't purposely set out to make 13 cupcakes but in order not to waste the batter leftover in bowl, i filled a cupcake case, stuck it on a baking tray and off it went into the oven to bake and it didn't collapse like i thought it would having no support from a bun tin.


    Chocolate Lemon Cupcakes

    Makes: 13

    Ingredients

    For the cupcakes:

    165 grams Unsalted Butter (you can use margarine), at room temperature
    165 grams Caster Sugar / vanilla sugar
    3 eggs
    115 grams Self raising Flour
    50 grams Unsweetened Cocoa Powder
    Zest of 1 Lemon
    1 tablespoon of Lemon Juice

    For the Lemon Cream Cheese Icing:

    I halved the recipe from Lizzy
     
    1/4 cup Butter, softened
    4oz. Cream Cheese, softened
    Zest of 1 Lemon
    1/2 teaspoon lemon juice
    1 1/2 - 2 cup icing sugar, as needed

    Method

    1. Pre-heat oven to 160C Fan/180C and line a bun tin with cases (don't forget you will have enough batter to make 13 so either bake 12 first and then 1 seperately or use a 24 hole bun tin if you have, alternatively fill the odd case and place on baking tray and bake on oven shelf underneath your 12 like i did)
    2. In a bowl mix whisk together cocoa and flour, set aside. In a large bowl or stand mixer, cream together your butter, sugar, lemon zest until light in colour and fluffy. Add eggs, 1 by 1 ensuring each egg is fully combined before adding the next.
    3. Add cocoa/flour and your lemon juice and mix/fold in just until you have no traces of flour/butter left.
    4. Bake on the rack just 1 lower than the middle for 15-20 minutes or until a cake tester inserted comes out clean. Remove from oven and place on a wire rack to cool completely.
    5. Make cream cheese icing by mixing butter, zest, juice and icing sugar together and then add the cream cheese and mix until homogenous.
    6. Spread or pipe icing onto cupcakes and top with your favourite sprinkles/decorations. 
    2.11.2013

    Photos of my first Lemon Chocolate Cupcakes


    The Only Use I Find For The Telephone Directory lol 
    Salam Alaykum,

    For a short while now i have been developing my own cupcake recipes, likey likey my Chocolate Coconut Cupcakes and Espresso Cupcakes.

    The Lemon Chocolate Cupcakes pictured above are a work in progress.... i have succeeded with the cupcake itself, but the buttercream icing i made although it looks delightful was too sour, I'd over estimated how much i liked the bitter taste of lemon and not taken into account the fact that cocoa powder itself is slightly bitter, tut tut.

    I was inspired by Lizzy's Chocolate Lemon Cupcakes and i mean come on what girl doesn't like either chocolate or lemon so why not combine both win, win situation!

    I don't work from box mixes so following Lizzy's recipe was out of the question and since I'd had success before inventing cupcake recipes i thought why not? anyway i may take a leaf out of her book next time and go for a lemon cream cheese frosting as there is something eye catching about the contrasting colours, brown cupcake and creamy coloured frosting.

    I am cupcaked out to be honest but my son's only baking request these days is 'let's make cupcakes' masha'Allah he helps by turning on the mixer and whisking the cocoa powder/flour together oh and he is a dab hand (NOT but let the lad learn) at sprinkling the sprinkles lol

    * Note: Here is the link to my Chocolate Lemon Cupcake Recipe
    1.31.2013

    Chocolate & Coconut Cupcakes


    Salam Alaikum Wa Rahmatullah,

    That's right the cupcake monster is back again, ready to urge you to get into the kitchen, put on your apron and do some baking!

    Recipe adapted from my victoria sandwich cupcakes

    Tip: Coconut oil is solid at room temperature so what you can do to make the whole process of creaming easier is melt the coconut oil in a pan on low heat and allow to cool a little before mixing with your butter and sugar.

    I tried something different by trying to make these cupcakes look like british butterfly buns

    Don't think it quite worked! rather a fat inelegant butterfly lol

    Chocolate & Coconut Cupcakes

    Makes: 7-8 regular size cupcakes

    Ingredients

    For the Cupcakes

    • 70g margarine or unsalted butter, softened
    • 40g extra virgin coconut oil, room temperature
    • 110g vanilla caster sugar 2 medium size eggs
    • 80g self raising flour
    • 30g coco powder

    For the icing

    • 15g extra virgin coconut oil, room temperature
    • 60g margarine or unsalted butter, softened
    • 175g icing sugar
    • 1-2tbsp coconut milk
    • Coco powder for dusting

    Method

    1. Pre-heat the oven to 350F/180C/160C (fan). Line a bun tin with paper/foil cases
    2. In a large bowl, cream together your butter, coconut oil and sugar until light and fluffy. In a small bowl, whisk the eggs and then slowly add them to the mixture in your larger bowl, whisk mixture continually to prevent it from splitting.
    3. Sieve flour and coco powder over the mixture and gently fold preferably using a large metal spoon until the flour has just combined.
    4. Fill cupcake cases 2/3 full and bake for 15minutes. Once cooked the cupcakes should be springy to touch and when you insert a cocktail stick in the center it comes out clean i.e. not sticky, a few crumbs are OK. Transfer to a wire rack to cool.
    5. Make the icing: cream together butter and coconut oil, slowly add sifted icing sugar and then add milk until you get you desired consistency.
    6. Once the cupcakes have cooled, fill your piping bag fitted with desired nozzle with icing and pipe onto centre of cupcakes.
    7.  Dust cupcakes with coco powder (optional) another idea would be to add desicated coconut
     
     
    1.18.2013

    Espresso Cupcakes

    *note the above pictures were from the first batch of espresso cupcakes which were nice but weaker in coffee flavour, i was still working on the recipe! here they are darker and stronger!


    Espresso Cupcakes

    makes 9-12 depending on the size of your cupcake cases

    Ingredients

    For the cupcakes

    • 110g / 4oz margarine or unsalted butter, softened
    • 110g / 4oz vanilla caster sugar
    • 2 medium size eggs
    • 2tbsp strong espresso coffee, brewed and then cooled
    • 1/4tsp cinnamon
    • 110g / 4oz self raising flour

    For the filling and topping

    • 150ml double/heavy cream, whipped to form stiff peeks add a tbsp icing sugar to sweeten or to taste
    • 100-150g your favourite type of chocolate, melted
    • Icing sugar for dusting, optional extra

    Method

    1. Pre-heat the oven to 350F/180C/160C (fan). Line a bun tin with paper/foil cases. brew coffee and leave to cool.
    2. In a large bowl, cream together your chosen fat and sugar until light, fluffy and creamy coloured. In a small bowl, whisk the eggs and then slowly add them to the mixture in your larger bowl, whisk mixture continually to prevent it from splitting.
    3. Sift flour over the mixture and gently fold preferably using a large metal spoon, when the flour is nearly all incorporated add the espresso and fold until mixture is a even colour.
    4. Fill cupcake cases 2/3 full and bake for 15-20mins (mine were done at 18 minutes) they should be springy to touch and when you insert a cocktail stick in the center it comes out clean i.e. not sticky, a few crumbs are OK. Transfer to a wire rack to cool.
    5. When cool, slice a little circle out of the top of each cupcake. Fill with a generous teaspoon of sweetened whipped cream replace lids, melt chocolate and drizzle over lids, leave to set and then dust cupcakes with icing sugar, using a sieve and from a height.
    *Feel free to sprinkle a touch of cinnamon and/or cocoa powder onto the whipped cream centers before replacing the cupcake lids.
    9.15.2012

    The Creamiest Nutella Ice Cream!


    I know i shouldn't...i really shouldn't but what do you do when your in the ice cream making mood, there is no milk left in the fridge and a big pot of double cream? Yes, make the most creamiest nutella ice cream there as ever been.....FOR REAL!

    I have come across other more, more healthy versions of nutella ice cream like this one which mine is based on but instead of using unsweetened evaporated milk i used double cream, oh yes.

    You start off by warming nutella in the microwave on 10-15second boosts until it becomes well melted chocolate, then you pour in the double cream give it a whisk, have a quick taste, your checking it's sweet enough?! add a tablespoon at a time of icing sugar if needed. Pour into your ice cream maker and in less than 15 minutes you will have the creamiest nutella ice cream you will have ever tasted!

    Another reason i shouldn't have made this ice cream as whilst i were busy taking snaps in the kitchen, my 2 children got out their play doh ice cream maker and made lots of ice cream themselves that stuck right onto my carpet! That'll teach me.

    Recipe


    Ingredients

    1 cup nutella, slightly warm
    2 cup double cream, chilled (To be fair, you could substitute 1 cup for whole milk or single cream if you want, as the nutella itself thickens the ice cream as it churns and freezes anyway)
    Icing Sugar * to taste

    Method

    Melt the nutella in a microwavable bowl on 15 second short bursts, stirring in between then pour contents into a large heat proof bowl.

    Pour the double cream into the nutella and whisk until you see a sea of light brown, check for sweetness and add icing sugar if needed.

    Freeze according to your ice cream maker manufacturer instructions, should take no longer than 10 minutes.

     Eat or freeze in a suitable container until required.

    As this ice cream is extra thick, you will need to leave it out on the counter top for at least 15minutes before the desired consistency for spreading between wafers for an ice cream sandwich.

    Use sprinkles to decorate or even some chopped roasted hazelnuts.
     
    optional: - Melt a heaped teaspoon of nutella in the microwave and spread on top of your ice cream sandwich, use a cocktail stick to make a nice swirl pattern.
    7.14.2012

    Mint Chocolate Madeleines


    Earlier this week i mentioned my trouble baking madeleines, it's not that i haven't made them before but well i was out of practice and had forgotten which recipe i previously used. 
    This is one  of the reasons i started to blog, so i would have a log of all my favourite baking recipes without having to search in cupboards, draws for that printed recipe you know you had but it's not in there now, dilema.

    Did you know? history dates the beginnings of madeleines back to the 18th century in the French town of Commercy, in the region of Lorraine.The story goes that a girl name Madeleine made them for Stanislaw Lezczynski, Duke of Lorraine, who loved them so much that he then gave some to his daughter, Marie, the wife of Louis XV. 
    Their popularity grew from that point on and if we fast forward to today we know that they are now enjoyed in many countries around the world.

    Madeleines are made with a genoise sponge batter which is a combination of butter, sugar, eggs, flour, and are traditionally flavored with lemon or orange flower water however, after several attempts and becoming bored of the classic madeleine flavour (me that is, hubby was quite happy with what i deemed plain) finally this morning i got a green light in my head metaphorically speaking signaling mint chocolate which is a favourite flavour of mine in cupcake form in fact any form, what about you?
    I adapted this recipe from Joyofbaking.

    Now i am satisfied with my madeleines alhamduillah (All praise to God) and would like you to be too inshAllah (God willing)


    Makes about 24 - 3 inch (8 cm) madeleines.

    Ingredients


    113 grams unsalted butter
    110 grams all-purpose flour
    20 grams unsweetened cocoa powder
    1/2 teaspoon baking powder
    1/8 teaspoon salt
    3 large eggs at room temperature
    2/3 cup (133 grams) granulated white sugar
    Seeds of 1 vanilla pod or 1 teaspoon halal vanilla extract
    1/4 teaspoon to 1/2 teaspoon peppermint oil (depending on how strongly you want the mint flavour to come through)

    Method


    First, melt the butter and allow it to cool while you make the batter.

    In the bowl of your electric mixer using the whisk attachment, beat the eggs and sugar at medium-high speed until the mixture has tripled in volume and forms a thick ribbon when the beaters are lifted (about 5 minutes). Add the vanilla and peppermint oil, beat to combine.

    fold the flour mixture into the beaten eggs to lighten it. Sift the rest of the flour over the egg mixture and fold in being sure not to overmix or the batter will deflate. 

    Whisk a small amount of the egg mixture into the melted butter to lighten it. Then fold in the cooled melted butter in three additions. Cover and refrigerate for at least 30 minutes, or several hours, until slightly firm.
    Position a rack in the center of the oven and preheat to 375 degrees F/190 degrees C/170 degrees C(fan). 

    Generously and i mean generously, butter two 12-mold madeleine pans.  Dust the molds with flour/fine semolina (maybe next time i will use cocoa powder because the fine semolina was apparent on the shell side of these petite four) and tap out the excess. 

    (Make sure the pans are well greased or the madeleines will stick and be hard to remove.)
    Drop a generous tablespoonful of the batter into the center of each prepared mold, leaving the batter mounded in the center. (This will result in the classic "humped" appearance of the madeleines)

    Bake the madeleines for 11 to 13 minutes, or until the centers spring back when lightly touched.  Try not overbake these cookies or they will be dry.

    Remove the pans from the oven and rap each pan sharply against a countertop to release the madeleines (you can run your knife/spoon around each mold beforehand if your not confident like me)  Transfer the madeleines, smooth sides down, to wire racks to cool.

    The madeleines are best served the same day but can be stored in an airtight container at room temperature for 2 to 3 days or frozen, well wrapped, for up to 1 month.

    You can dust these with icing sugar before serving (optional).


    Powered by Blogger.